

WooCommerce PickingPal
WooCommerce PickingPal is a shipping and fulfillment accuracy app that helps you ship orders faster and more accurately, and reduce returns. Scan your order barcode, scan your items, and let PickingPal do the rest!
No scanner or barcodes? We’ll help with that, too. Visit PickingPal.com.
WooCommerce PickingPal Installation
- Download the .zip file from your WooCommerce account.
- Go to: WordPress Admin > Plugins > Add New and Upload Plugin with the file you downloaded with Choose File.
- Install Now and Activate the extension.
More information at: Install and Activate Plugins/Extensions.
Usage
- Once a new order comes in, print the PickingPal Pick Ticket / Invoice (included)
- “Pick” all of the order items from inventory, pull up the PickingPal main screen, and then scan the Order barcode on the Pick Ticket. This will load all the Order items into “Unpicked items” section of the screen
- Scan the barcode of each picked item, and let PickingPal go to work.
> If you’ve picked the correct item, PickingPal will display a green indicator, provide an “OK” confirmation tone, and move that item to the “Picked items” section.
> If you’ve picked an incorrect item, PickingPal will display a red alert indicator, and provide a “NOT FOUND” warning tone. - Along the way you’ll see a progress indicator and once the order is pick-complete, the system will confirm it onscreen and audibly too with a 100% pick-complete tone!
Printing PickingPal Pick Tickets
In WordPress Admin, visit WooCommerce > Orders
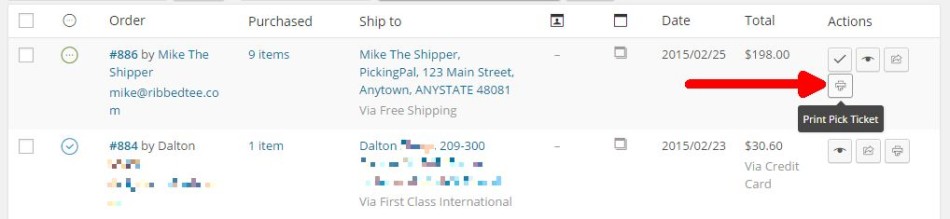
Print One (1) Pick Ticket
Find the Order you would like to ship, and click the “Print Pick Ticket” action button.
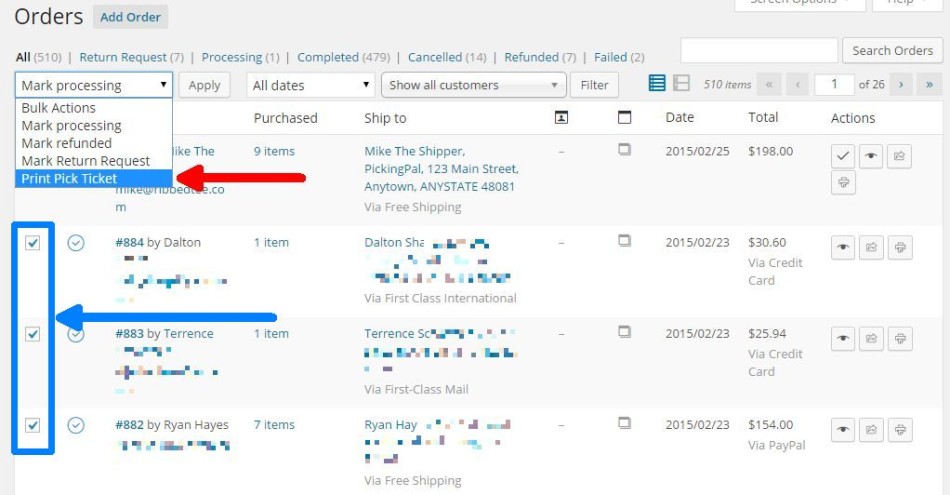
Print Multiple Pick Tickets
Using the checkbox on the far left, select the Orders you would like to ship, then use the “Print Pick Ticket” option from the Bulk Actions dropdown.
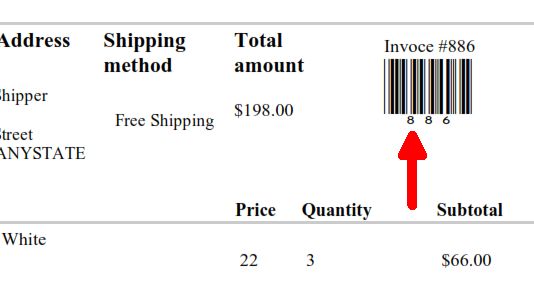
Scan Order Barcode on Pick Ticket
In the WordPress Admin, visit WooCommerce > PickingPal:

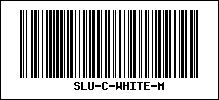
Using your barcode scanner, scan the Order barcode on the PickingPal Pick Ticket.
Scan barcode
Order Loaded
Once the Order is loaded, you’ll see that all the Order line items appear in the “Unpicked items” list, and the cursor has moved to the Product SKU field above.
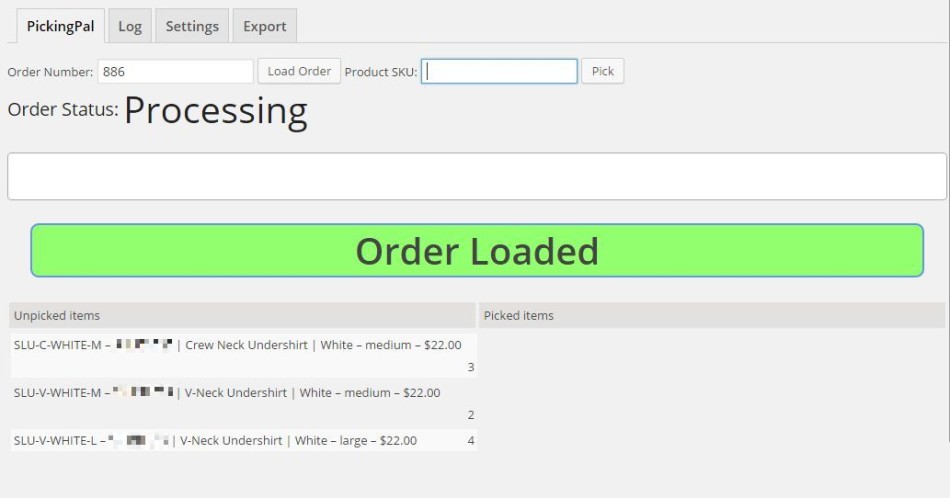
Now, you’re ready to start scanning barcodes on items themselves.
Scan Barcode on Order Items
Grab your first Order item (the physical item you’re shipping) and scan the barcode on that item. In our example, we’ll start by scanning the White, Medium, Crew Neck Undershirt item.

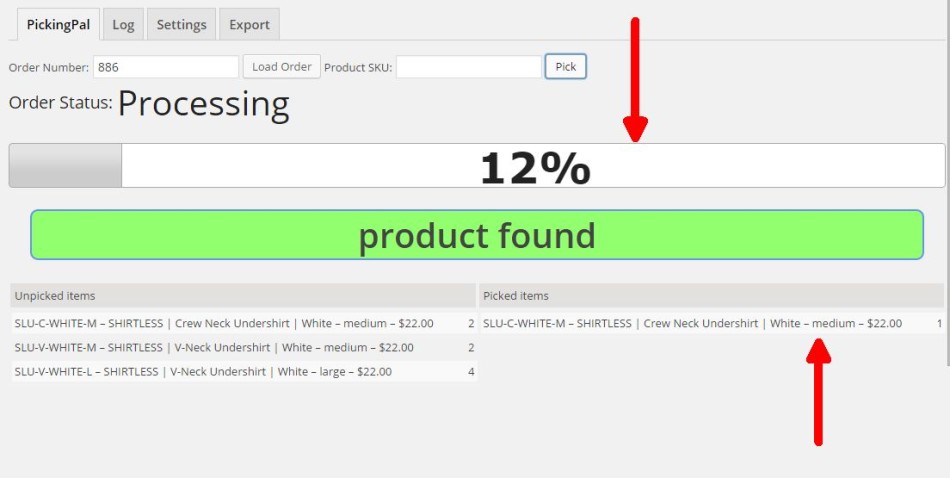
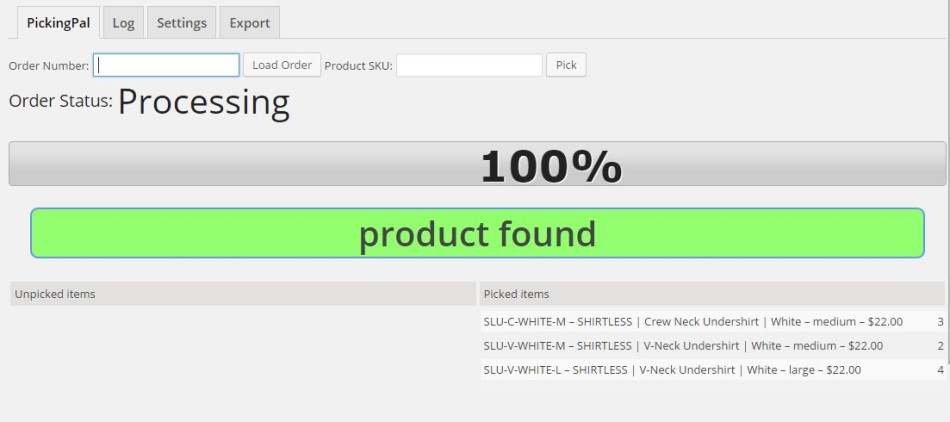
Picking Progress
During a successful barcode scan, you will see and hear the following visual and audible “OK” notifications.
- Progress bar will show an increase % scanned, and the grey shaded area will grow
- Green “product found” indicator
- “OK” audible sound
Repeat the above process for each picked item:
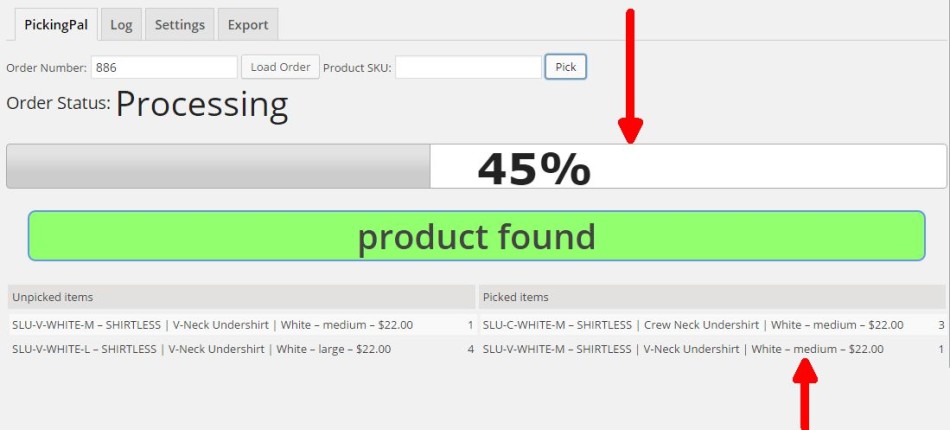
Once picking is complete, PickingPal will show the progress indicator at 100%, play a “pick complete” audible sound, and reset the cursor into the Order Number field to prepare for the next Order barcode scan.
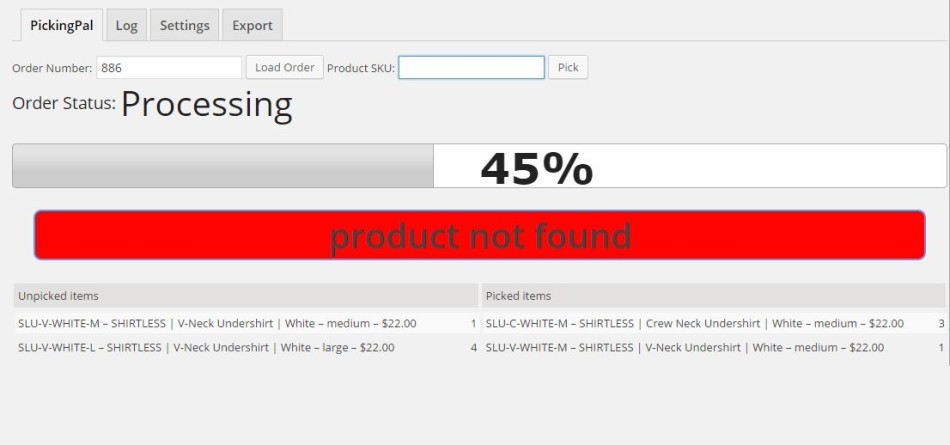
Scanning Incorrect Items
During a scan of an incorrect item, you will see and hear the following visual and audible “NOT FOUND” warning notifications.
- Progress bar will NOT show an increase % scanned, and the grey shaded area will NOT grow
- Red “product not found” indicator
- “NOT FOUND” audible sound (a buzz)
Scan Log
PickingPal maintains a log of all “pick complete” Order scans.
If an Order has not been scanned or has not been “picked complete” (where 100% of items have not been successfully scanned), it will not appear in the log.

To search for an Order, enter the Order # in the upper right Search box, or navigate through the Order pages using the Navigation arrows at the top and the bottom of the Scan log table.
Setup and Configuration
Pick Ticket Template Setup
PickingPal comes with a configurable Pick Ticket Template. To Customize the Pick Ticket:
- Select/Upload a Banner Image. Max: 300px wide
- Add in up to 5-6 lines of your Company Information such as your company name, address, phone/fax, and email
- Use the bubble help for additional information
- Save Changes.
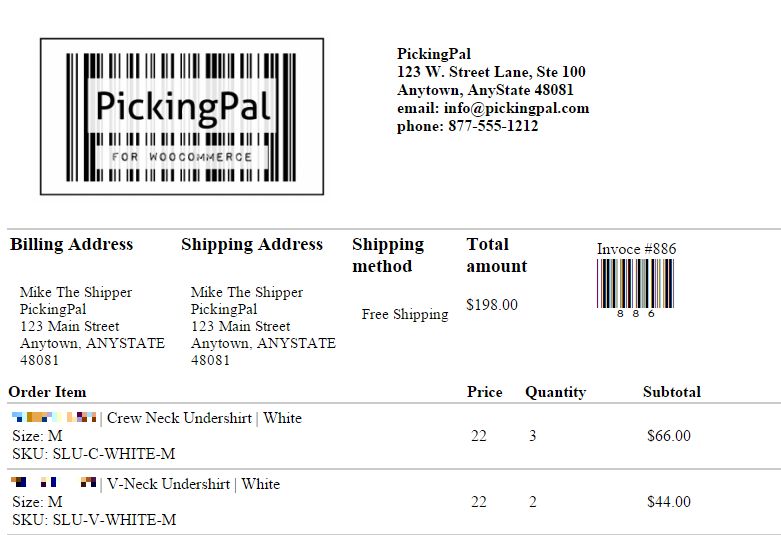
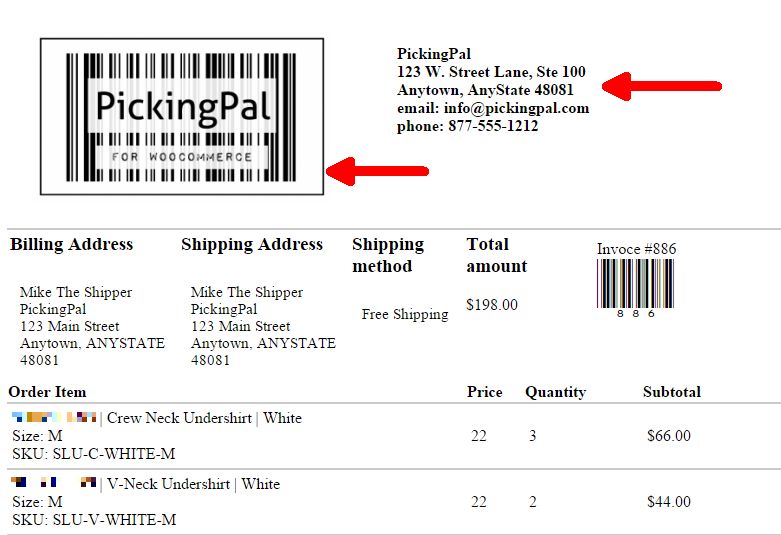
![]()
Example of Customized Pick Ticket
Customizing Your Pick Ticket & Packing Slip Layout
You can use the default Pick Ticket & Packing Slip templates, or create and style your own.
Create your own Pick Ticket & Packing Slip by following these steps:
- Copy the
woocommerce-pickingpal-templatefolder from thewoocommerce-pickingpalplugin directory to your/wp-content/themes/{your-active-theme}/woocommerce/directory - If you are utilizing a child theme, you may need to create the /woocommerce/ folder first within that theme folder
- Edit the templates as you wish
Template Files
template_list.php – Pick Ticket (Orders View)
template_slip.php – Packing Slip (Within PickingPal)
If you run into any trouble with the Custom Template, simply remove the woocommerce-pickingpal-template folder.
This will reset the system to use the included Pick Ticket & Packing Slip Templates.
Export Setup
Your item barcodes can contain as little as your SKU and the SKU’s barcode, or additional information such as Product Name, Price, Color, Size, or any other attribute you feel would be helpful to have printed on the barcode label.
PickingPal helps facilitate the creation of barcode labels by allowing you to easily create a CSV Export file with the raw data needed to generate the barcode labels. Think of this as a big mail-merge file that you can send to your barcode label provider
Click here to download WooCommerce PickingPal